Yep. Another one.
I’ve always been dissatisfied with the design compromises I made with the Series One cockpit. It was “109-ish”, but not as good as it could have been. Life events and other projects have consumed my time and I never thought I’d get around to creating as good a design as I knew I could have. Well that all got turned on its head last year when a friend of mine from Australia started throwing CAD drawings at me for Bf-109 parts.
He started small. “Have a few instrument panel drawings”, he says. I should’ve known better. My first “uh oh” moment came when he sent me some Bf-109K4 panel drawings. It turns out that due to war shortages of aluminum, the companies building the Bf-109K4 (and some G marks) were using wood for the instrument panels! I also learned that the Bf-109K4 as well as the G models used a three part panel. There was an upper casting (carving?) that held the SZKK3 ammo counters, the gunsight mount, clock and MG151 lamps. The lower panel contained “misc” instruments and the third component held the “blind flying” instruments.
Because the original instrument panel was made of wood, I strongly suspected that it wouldn’t be that hard to get a pretty damn good looking replica using some 3D printed components and all the 2d work done on my ShopBot.
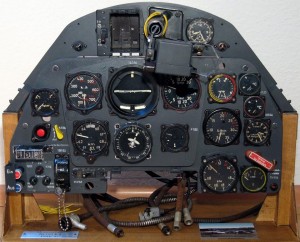
Here’s what a real Bf-109K4 instrument panel looks like – I wish I knew the owner of this fine display! (If you know, please let me know in the comments so I can properly credit the photo!)
I figured if nothing else, I could knock together the panel even though I wasn’t going to be building a simulator around it. What could it hurt, right?
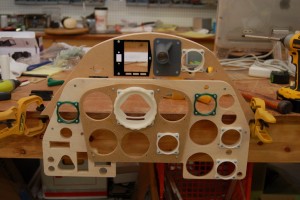
After a few part revisions, here’s what I managed to cobble together:
Ross had been throwing bezel ring models at me and I printed a few that ended up in the panel shown above.
He kept tempting me with piece after piece. I finally told him, “Look, until you can scrape up good drawings for the windscreen framing, I’m not going to be tempted by your relentless torture-by-drawings.” I was hoping that would put the matter to rest. I’d NEVER come across good windscreen drawings in all the research I’d done for the Series One project, so I figured I was pretty safe.
Yeah. That worked. Not.
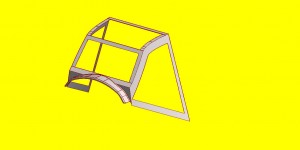
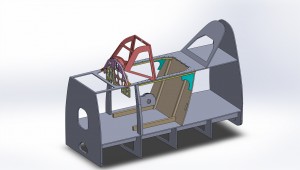
It wasn’t a week before he dropped a 3D model of a G/K series windscreen frame in my lap, ready for slicing and dicing in SolidWorks. Here’s an early version of what he sent me:
I knew at that point that I was staring into the depths of a bottomless rabbit hole. I had thrown down the gauntlet and Ross casually picked it up and says, “Ya dropped this, mate.” He lives on the bottom of the planet and I’m quite sure I could hear him snickering. Loudly.
I started doing more research and discovered that a TON of mechanical drawings had escaped the clutches of EADS in the years since I’d done my original research work on the Series One. Most were crappy, low-resolution scans. However, there was enough data in there that it was looking like doing a really good, 1:1 scale Bf-109 cockpit could be realistically accomplished.
I’d joined a few Bf-109 “fan” groups on Facebook that Ross turned me on to. This lead me to running into a guy named Espen Revheim via some of the Bf-109 groups I belonged to. He’d built himself a Bf-109G6 cockpit section that looks SO good, my first reaction was “Oh bull. He’s restored a war wreck. There’s no way that’s scratch built.” Then I saw the photo with the CH rudder pedals inside the cockpit and my head exploded. He HAD scratch built it! It turns out that he had easy access to a Bf-109G6 that was undergoing restoration, just down the road. He’d leveraged that access to get the dimensional data he needed in order to build his simulator cockpit. I took a chance and asked him if he could get me dimensions on the windscreen framework. A short time later, dimensioned photos showed up and the last nail was driven home. I was going to be building a Bf-109K4 flight simulator cockpit.
The dimensions that Espen sent allowed me to refine the model that Ross had created so I could get it as close to the real thing as I could. This project isn’t going to be a “kinda-109”, it’s going to be as physically close to the real thing as I can possibly get it. I’m treating it as a 1:1 scale model building project first, and a flight simulator project second.
After three full revisions of the windscreen design, I ended up with a four part windscreen assembly that could be made from 18 and 12mm Baltic Birch plywood.
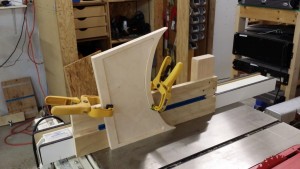
The tricky part of the windscreen build was going to be the bevel cuts that have to be made. The windscreen sides must be beveled in 12 degrees along the long edge and 17 degrees along the short (bottom) edge. The face frame needed to be beveled 20 degrees in from two different directions. I ended up creating alignment jigs that were the same size & shape as the open spaces and in the side and face frames. This allowed me to align the to-be-cut edge square against the edge of a sacrificial board and the center would be screwed down.
Here’s what the setup for the first cut on the face frame looked like:
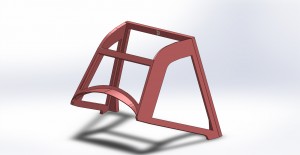
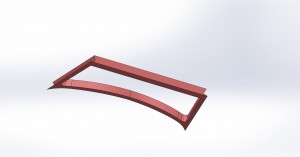
The center of the windscreen face frame is filled with the alignment jig that I mentioned above. When making the second cuts, the frame is locked into place using that jig. Unfortunately I don’t have photos of that process. When finished, the face frame has a notch that looks like what is shown in the model below.
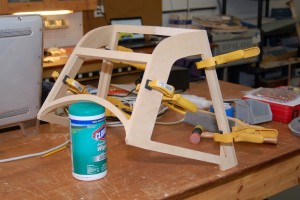
Here’s what the end result looks like:
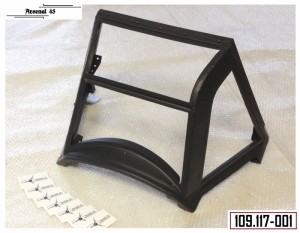
It’s not glued up yet – this was just a test fit to make sure that I got all the components cut properly. For comparison, check out this real, newly manufactured, Bf-109K4 windscreen by the fine crew at Arsenal 45. (They build REAL Bf-109s!)
I have a few details I’d like to add (like the groove along the center of the windscreen face frame’s top) as well as some final finish sanding before I do the final assembly on it.
Progress on this project is going to be slow. VERY slow. I have limited time to work on it since I’m still putting most of my efforts into the F-15C. This WIP model will have to tide you over until the next update. 🙂
Many thanks to Ross Ebzery for chumming the water with Bf-109 mechanical drawings. 🙂
Thanks for reading!
Looking great Gene, very inspiring
WTH?? WTF??? FAR Too many neat things coming from this workshop…..
Possibilities:
1 – Gene NEVER sleeps.
2 – Gene is actually triplets
3 – Gene’s workshop is actually a dormitory for Gene clones. Many, MANY Gene clones
4 – Gene has a time machine and a future Gene sends project work back in time because the future workshop is too crowded.
5 – ???
Hi Gene,
Really nice work, look forward to seeing it progress.
How is Castar going?.
Les
Nice work as always!!! Cheers Gwyn
Amazing.
How to solve ammo counter?
I’m suffering it…
I’m quite a ways out from building the ammo counter, sorry.
Owner of the panel is Dominikus hausmann, lives in munich. send me a PM for his contact details